Friday, November 10, 2017

Cherry Tarts ala The Weekend Wife: A Book Review and The Weekly Menu #FoodiesRead

I enjoyed a quick, easy read that I wanted to share with you.  This book was recommended by James Patterson whose work I enjoy.  I decided that if he were endorsing this book then it was probably worth the time to read it.

Image result for the weekend wife james patterson

It is part of his BookShots series, where he recommends fast reads for under $5 and less than 150 pages.  Perfect for when you want a quick read for a lazy afternoon or on an airplane flight. 

This was the first novel I have read written by Ciotta.  It was a fun little romantic love story that held my interest.  I read it in one weekend, picking it up whenever I found myself with some spare time.  It takes place in Tuscany so right there it was a book after my own heart.  It featured a grandmother who loved to cook, another plus.  

It, of course, has the perfect couple who don't realize that they are perfect and obstacles that get in the way but you know, right from the start, that this is going to be a story with a happy ending.


One of my favorite parts was when Megan is getting to know Nick's grandmother who lives in Tuscany and she teaches Megan how to make cherry tarts.  I think being in the kitchen with someone is the perfect way to spend time getting to know each other.

I made these little tarts for our friend, Chris, who is coming to dinner tomorrow evening.  I hope he enjoys them as much as I enjoyed this book.


I will be sharing this recipe and book review over at Foodies Read 2017.  Come check out what everyone else is reading this month.


There is really not much of a recipe for these tarts.  I used store bought crust and canned cherry pie filling as I was out of my Homemade Cherry Pie Filling.  I added a half teaspoon of almond extract to the canned filling before filling the shells.

Cherry Tarts

1  refrigerated pie crust
2 (21 oz) cans cherry pie filling
1/2 t. almond extract

Measure your tart pans and using a cutter or sharp knife cut out rounds from the unrolled pie crusts to fit the tart pans.

Combine the pie filling and almond extract.  Divide between the tarts.  Place tart pans on a baking sheet and bake in a preheated 425* oven for about 20-30 minutes. Until crusts are golden brown and filling is bubbly. Print Recipe

Weekly Menu 11/11 - 11/17


Sunday is our Choir Concert, I am making a Cranberry Coffee Cake to be served at the reception following the concert and then we will go out for dinner.  Dessert before dinner is allowed every once in a while.

Monday evening we have a meeting at church and Wednesday I have Food Pantry after which we will be going over to Amy's to celebrate Melody's Christening Anniversary. I am bringing dessert.

We are celebrating #CranberryWeek in our Festive  Foodies Event Planning group, so stay tuned for lots of wonderful recipes containing these little powerhouse berries.

So here is my Weekly Menu.  Please stop by each day as I share recipes and photos.

Saturday-Chris for Dinner
Beet Salad with Creamy Coffee Dressing
Surf and Turf 
Mashed Potatoes
Steamed Broccoli
Cherry Tarts

Sunday
Out for Dinner after Concert

Meatless Monday
Beet Shakshuka

Toddler Tuesday
Mac and Cheese

Wednesday-Dinner at Amy's
Orange Cranberry Bundt Cake

Thursday
Chicken Teriyaki Subs

Fish Friday
Lime Chili Scallops
Scallion Rice
Stir Fried Veggies


Thursday, November 9, 2017

Spaghetti Squash and Cheese #ImprovCookingChallenge

Today's Improv Cooking Challenge ingredients are Winter Squash and Bacon.  Improv Cooking Challenge is a fun little group where our leader, Nichole of Cookaholic Wife, chooses two ingredients each month and challenges us to each make one wonderful recipe using those ingredients.


I had gotten some Spaghetti Squash from my friend, Kim, last month when she was harvesting the last of her garden.  I knew that it would be perfect to use in this challenge.  I decided to make a riff on pasta and cheese, substituting the Spaghetti Squash for the pasta and adding bacon for extra flavor and richness.


I cooked the spaghetti squash in the microwave.  Once cooked the squash was shredded and placed in a skillet over med high heat to cook away some of the liquid.  Once the squash was dry, I stirred in some bacon bits and  added some milk and butter to the skillet.  When the butter was melted and the sauce was slightly thickened I incorporated some cheese.


Transferred the squash mixture to two individual crocks and topped with additional cheese.  Then it was placed under a broiler until the cheese was browned and the sauce was hot and bubbly.


Let rest for a few minutes before serving.  This recipe makes 2 individual casseroles.  You can double the recipe and use a large casserole for a family sized meal.


This is a very rich and delicious.  This is a perfect Meatless Monday Meal paired with a salad.  It can also be served as a side dish, in which case this recipe would serve 4 or more.


Spaghetti Squash and Cheese 

1 spaghetti squash
3 slices bacon, cooked crisp and crumbled
1/4 c. milk
1 T. butter
1/2 c. shredded Monterey Jack cheese, plus more for sprinkling

Pierce the squash all over with a sharp knife. Place on a microwave safe plate and cook in the microwave on high heat for 10-15 minutes, checking every 5 minutes, until the squash is tender and easily pierced with a fork.

Cut in half, remove seeds and shred the squash into strands.  Place the strands into a skillet over med high heat and cook until liquid is absorbed and squash is dry.  Stir in the bacon bits, milk and butter.  Cook and stir until butter is melted and milk is partially absorbed.  Stir in the cheese until melted and creamy.  Divide between two individual casseroles.  Sprinkle with additional cheese.  Place under a broiler until hot and bubbly and cheese is browned.  Let rest for a few minutes before serving.  Print Recipe

More Winter Squash and Bacon Recipes


Wednesday, November 8, 2017

An American Wine for an American Holiday #WinePW Preview Post

I am very excited about hosting our Wine Pairing Weekend this Saturday.  I chose the theme American Wines for an American Holiday.

Image result for thanksgiving 

I am starting to think about my Thanksgiving Menu.  Figuring out how many people will be joining us and what favorite foods I can make to ensure that their Holiday is filled with love and gratitude.

Image result for non traditional thanksgiving

I asked the members of our Wine PW group to join me in this endeavor and share their favorite American Wines that would pair perfectly with whatever Thanksgiving Feast you may have in mind.

Do you celebrate Thanksgiving in typical American Fashion? Do you enjoy roast turkey, mashed potatoes, stuffing after the parade and before the football games?  Do you include any of your favorite ethnic Holiday foods and traditions?  Or are you like our friend, Cam, whose Thanksgiving Tradition is Adventure?

Image result for American wines

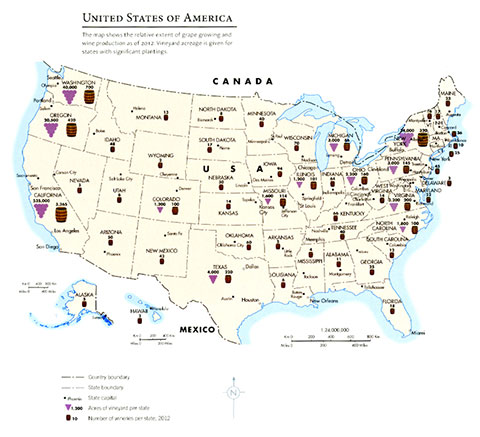
Whatever your traditions are, this year why not include some American wines in your planning.  Many of our wine growing regions and vintners are offering stiff competition to Countries that have been growing grapes and making wines for thousands of years.  

Related image

As a young Country we have made quite the name for ourselves. Our west coast states, California, Washington and Oregon are very well known both nationally and internationally.  Some of our lesser known grape growing states are also making names for themselves.  

Does your State have wine growing regions?  How do you find the wines from your region compare to those of the West Coast or those from France, Italy, Spain and Germany?

We would love to hear your thoughts on this when I and the others join together for a twitter chat on Saturday, November 11 at 11 AM ET, to discuss what wines we are serving for Thanksgiving and which American wines we shared in our monthly posts.  

I am listing those posts here so that you are able to peruse them before the chat and share your impressions and ideas.  You will find us by following #WinePW.   See you then!


All graphics used in this post were found on Google Images.


Tuesday, November 7, 2017

An Instant Pot Taco Tuesday Recipe and an Audible Book Review

As you are reading this post, I will be enjoying my last day in Las Vegas.  Don't worry, if I am a millionaire right now I will still have room and time for all my readers LOL.

Image result for the inside dark james hankins

Before I left, I had finished listening to another novel by James Hankins, The Inside Dark. It is the story of a serial killer with typical Hankins twists and turns.

When I first started listening to this novel I thought I had the twist all figured out.  I was kind of disappointed and wondered if Hankins had become to predictable to me.  Not to worry, there were more red herrings in this novel than that first that he threw our way.

As with all of Hankins' novels there is no clear delineation of good and bad.  Oh, the serial killer is pure evil of course but the other characters are a blend of inside light and inside dark.  There is always a lot of gray in Hankins' writing which makes it very believable even when unbelievable things are happening.

This book will haunt you though.  You know how you can never see a flock of birds without thinking of the Hitchcock movie?  Or a clown without thinking of the King novel?  Should you read this book you will never be able to hear the tune "Take me out to the ballgame" without shuddering as you remember this book.

If you enjoy Hankins you will not be disappointed.  If you have never read Hankins but enjoy King and Koontz, you will like Hankins as well.

Since it is Taco Tuesday, I wanted to share a TexMex recipe that I made in my Instant Pot.  If you don't have an instant pot, this recipe can be made in a slow cooker.....just not instantly ☺

I adapted this recipe from the booklet that came with the Instant Pot.  I used an English Cut Pot Roast.  You can use any kind of pot roast, including a rump roast, cut into chunks or even stewing meat could be used.


I am constantly amazed at how deliciously tender meat becomes in such a short time using the pressure setting on the Instant Pot.  Cuts that before now, I had only been able to make by planning ahead and using the crockpot or braising for hours in the oven can be put together in a little over an hour.

The meat easily shreds with a fork.  Remove any fat or gristle and you have a gorgeous pile of meat that can be used immediately or saved for another day.


There was enough meat for 6 large burritos.  I made enough for us to have dinner one night and saved the rest for lunch the following day.  


Once the beef is cooked and shredded, it is merely a matter of stuffing and folding the tortillas, spooning some of the cooking sauce (or fresh enchilada sauce, if you prefer) over the burritos, sprinkling with cheese and placing them under the broiler for a few minutes.  


While the Instant Pot was doing all the work, I made up some Spanish Rice and heated a can of refried beans while Frank made us up some of his Fantastic Margaritas.  


Dinner was on the table in an hour and a half, less time than it would have taken us to drive to a restaurant, get seated and be served and at a fraction of the cost.  Of course, if I'm winning big as you are reading this then the only thing that would inspire me to make these burritos at home rather than going out to eat would be how amazingly delicious they were!!

Chile Colorado Burritos
adapted from the Instant Pot recipe booklet

1 English Cut Pot Roast, Bones and fat removed, Cut into quarters
salt and pepper, to taste
2 T. canola oil
1 c. enchilada sauce
2 beef bouillon cubes
1/2 c. water
6 large tortillas
2 c. shredded Mexican Blend Cheese

Heat oil in Instant Pot on sauté setting. Pat the beef dry with a paper towel and season with salt and pepper.  When the oil is shimmering add the beef to the pot and sear on both sides.  Remove to a plate and set aside.

Add the enchilada sauce, bouillon and water to the pot.  Change the setting to pressure cooker and set the timer for 30 minutes.  When time is up allow the pressure to release naturally for 10 minutes, followed by quick release until valve drops.

Remove the beef from the pressure cooker to a cutting board.  Shred the beef with a fork, removing and discarding any gristle or fat.

Divide the meat between the tortillas, placing the meat in the center of each tortilla.  Fold, as you would an envelope and place the burritos, seam side down, into a baking pan that has been lined with foil.  Ladle some of the cooking liquid over the burritos and sprinkle the cheese over all.

Place under the broiler until cheese is melted and serve immediately.  Print Recipe


Saturday, November 4, 2017

An Instant Pot Recipe and the Weekly Menu that Isn't......

Frank got me an Instant Pot for my birthday at the end of August.  I have been using it and I love it.


I used it to make this wonderful, tender and flavorful Osso Bucco in the end of September but I've been so busy with blogging events that I haven't had an opportunity to share it before now.


One of my favorite aspects of the Instant Pot is that it has a setting that allows you to sear your food, right in the pot, whether using it as a pressure cooker or a slow cooker.  This not only saves dirtying another pan but it also saves dirtying your stove top and counters.  You know all those splatters you get when searing your food?  Well, the Instant Pot is deep enough that all of those splatters stay inside the pot.


Making a good Osso Bucco is all about layering the flavors and then braising it low and slow for many hours as I shared in this post using the oven.

This recipe uses a slightly different braising liquid of wine and beef broth instead of tomato sauce.  The great thing about these rustic recipes is that they adapt to whatever you have on hand.  I didn't have any tomato sauce this day but I had a ton of fresh tomatoes on my counter so I diced up a bunch and added them to the pot as well. 

You can also change up the seasonings to fit your taste or mood.  This time I just grabbed the jar of dried Italian seasoning and salt and pepper.

This dinner, normally reserved for days when we are staying home and relaxing can now be made in the Instant Pot.  I can still cook it low and slow using the slow cooker setting if we are going to be out and about during the day and want it ready when we get home or I can use the pressure setting, as I did this time, and have dinner on the table in a little over an hour.


I never would have believed that the meat would be fall of the bone tender in this short amount of time.  This dish was every bit as flavorful and lovely as when I braise it in the oven.   The recipe I am sharing at the bottom of this post is for two people, feel free to double or triple the recipe as needed.  I served the osso bucco over mashed potatoes this time but it is equally as good served over noodles.  

I am leaving in the wee morning hours tomorrow for Las Vegas with my daughter, Amy, sister in law, Roz and 3 friends.  This means Frank will be batching it on Sunday and Monday and going solo with the Angel Face on Tuesday.  I return late on Tuesday evening and then have a meeting early Wednesday morning.  I think we will probably grab dinner out after Melody's gymnastics class and have her Mom meet us at the restaurant.

Thursday we have our last choir practice before our concert on the 12th.  I will think about what we are having for dinner for that night and Friday when I get home on Wednesday.

I can probably guess that Frank will be making hot dogs and leftovers for himself and spaghetti for Melody on Tuesday.

Osso Bucco in an Instant Pot

2 meaty beef shanks
salt and pepper to taste
2 T. garlic infused olive oil (or plain olive oil and add a clove of garlic with the veggies)
1 small onion, diced
1 stalk celery, diced
2 carrots, scraped and sliced
1 t. Italian seasoning blend
2 tomatoes, chopped
1/2 c. red wine
1 c. beef broth

Pat beef shanks dry and season with salt and pepper.  Heat the olive oil in the instant pot on the sauté setting.  When hot, sear the beef shanks, about 5 minutes per side.  Remove to a plate and set aside.  Add the onions, carrot, celery and seasoning to the instant pot and stir, scraping up any browned bits stuck to the bottom, for about 4-5 minutes, until veggies start to soften.  Add the tomatoes and red wine, cook and stir until slightly reduced. Add the beef broth and return the shanks to the pot.  

Seal and cook, using the pressure setting, for 1 hour.  Allow the pot to naturally release the pressure for 10 minutes before using the quick release method until the pressure gauge is seated.  Open carefully.  Remove any bones and fat from the mixture and serve over mashed potatoes or egg noodles.   Print Recipe


Thursday, November 2, 2017

Lemon Breaded Pork Chops

I had these Pork Chops on my Weekly Menu for this past Sunday.  I had originally planned to serve them with mashed potatoes and spinach/tomato sauté. 


Then I received this wonderful shipment of #FabulousFallBounty from Melissa's Produce who is sponsoring a 5 day event beginning November 18th. 

This exciting event is being hosted by my friend, Cam of Culinary Adventures with Camilla, and is being sponsored by Melissa's Produce, Le Creuset and Silpat. A dozen bloggers will be sharing wonderful recipes featuring the very best in seasonal produce just in time for the Holidays.  

The first recipe I will be sharing is a wonderful French Soup, perfect for your first course on Thanksgiving day.  This will be followed by a Fall Flavors Salad that has been on my Holiday Table several times in the past.  I will also share a wonderful side dish and some cookies that will be great additions to your family feast.  

Not to worry though, I know life goes on even when you are busy prepping for the Holidays so I am also sharing a quick and delicious Mexican Meal to serve up during this hectic period.  I am so excited to bring all of this to you.

I'm sure you are thinking, "well, that is all well and good Wendy but Thanksgiving is still three weeks away" and you would be right.  So why am I rambling on about it when I am supposed to be sharing a pork chop recipe? 


Well, as you will see these wonderful pork chops were just one component of the dinner I served.  When I got this great package of veggies, I immediately changed up the sides that I was serving for dinner.


I simply took some of the fingerling potatoes, washed them up and placed them in a bowl.  Then I halved a Delicata Squash and removed the seeds.  Cut the halves into half moon shapes and put them in the bowl with the potatoes.  I added a couple Tablespoons of garlic infused olive oil, salt, pepper and fresh oregano and gave the bowl a couple of good shakes, tossing the veggies so that they were all covered with the seasoned oil.  Placed them in a hot (400*) oven for about 20 minutes, until fork tender and then served them with the chops. Delicious!!!!


This recipe was served up for us as Sunday Supper but it is on the table in half an hour so it is perfect for those busy weeknights too.  We are retired and were spending this particular Sunday, taking down the Gazebo, putting away the summer furniture and cutting down trees so a fast meal was perfect at the end of the day.


Lemon Breaded Pork Chops

4 pork chops, about 1/2" thick
1 c. Italian seasoned bread crumbs
Juice of 1 lemon and 1 t. of finely shredded zest 
salt and pepper to taste
leaves of 3 sprigs oregano, minced
2 T. garlic infused olive oil 
1/4 c. white wine
1/2 c. chicken stock
2 T. butter

Place the lemon juice in a shallow bowl.  Combine the bread crumbs and lemon zest.  Season with salt, pepper and oregano and place in a shallow bowl.

Heat the oil in a large, oven safe, skillet over med high heat.  Dip the pork chops in the lemon juice on each side and then dredge in the crumbs.  Cook in the hot oil for about 4-5 minutes on one side until golden brown.  Flip and place the pan into a 400* oven for another 4-5 minutes until the pork chops reach an internal temperature of 160*.  

Remove from oven and transfer chops to a serving platter tented with foil.  Place the skillet over med high heat and add the wine and the  chicken stock, stirring to loosen any browned bits stuck to the side of the pan.  Cook until reduced by half.  Whisk in the butter until the sauce is slightly thickened, pour over chops and serve.  Print Recipe


Wednesday, November 1, 2017

Oh, Bring Me Some Figgy Pudding #Foodie Extravaganza

Have you ever had Figgy Pudding?  You know, the one you here about in the song?  The one where they have to explain to Miss Piggy that they are saying Figgy pudding and not Piggy pudding?


This version right here!  This album is one of my all time favorite Christmas Albums.  I would highly recommend it.


Figgy Pudding is an Old English Holiday Tradition.  Why am I sharing it with you today? Today is the first day of National Fig Week!!  I make this wonderful dessert at least once each holiday season and it is always a huge success.  

I was very excited when my friend Cam, of  Culinary Adventures with Camilla, chose Figs as the theme for our Foodie Extravaganza party this month.  I had been holding onto this recipe since I made it last year.  When Cam announced the theme I knew this would be the perfect recipe to share, just in time for this years holiday dinners.


This dessert requires a special mold.  I don't know what you could use besides a pudding mold and I guess it could be used for other steamed puddings but I haven't ever made any other kind. Although you will find this recipe very similar to bread pudding so perhaps I will make my next bread pudding in this mold and see how it turns out.


First you reconstitute the fruit in water by first bringing it to a boil and then simmering until the figs are tender but still hold their shape.  Remove from heat and set aside.


I put the nuts into a food processor and pulse until they are finely ground, then I add in the bread and pulse until it turns into pea size pieces.  Pour that into a bowl, add the flour and whisk to combine.


Drain the fruit, reserving the liquid.  Cut some of the figs in half and press them onto the bottom of the mold that has been liberally treated with butter.  Roughly chop the remaining figs and set aside.


Make the batter and then pour it into the mold.  The mold gets sealed and placed into a water bath that reaches halfway up the sides to bake.


Remove it from the oven and the water bath.  Leaving it sealed, let rest for 15 minutes before opening.


It's now ready to be inverted onto a serving platter to await presentation at dessert.  All that is left to do is boil the reserved liquid from the fruit down to a syrup and whip some fresh cream.


When ready to serve, cut into slices, drizzle with the syrup and top with a dollop of whipped cream.  Your family and friends will soon be singing "Oh, bring me some piggy figgy pudding".


Foodie Extravaganza is a great party each month where we all get together to celebrate Food Holidays.  It is a lot of fun.  If you are interested in joining us you can learn more about it on our Facebook page.

Steamed Figgy Pudding 
adapted from Williams Sonoma

8 oz. dried figs, tough ends trimmed and discarded
1/2 c. dried currants
1 c. walnuts, toasted
8 slices white sandwich bread, crusts removed
1 1/4 c. flour
7 T. butter, room temperature
1/2 c. firmly packed, dark brown sugar
3 eggs
1 c. whole milk
1 t. vanilla
1 pint heavy cream, whipped

Place the figs and currants into a saucepan with 2 cups water.  Place over med high heat and bring to a boil. Reduce heat to low and simmer, uncovered, for about 20 minutes, until figs are softened but still retain their shape.  Remove from heat and set aside.

Place the walnuts into a food processor and pulse until finely ground.  Cut the bread into quarters and add it to the food processor.  Pulse several times until the bread is pea sized pieces.  Transfer to a large bowl and whisk in the flour until combined.  Set aside

Liberally butter a 7 cup pudding mold.  Remove the fruit from the boiling liquid, reserving liquid.  Halve enough of the figs so that they can be pressed decoratively around the bottom of the mold, cut side down.  Coarsely chop the remaining figs and set aside.

In the large bowl of an electric mixer, fitted with the paddle attachment, cream together the butter and sugar until fluffy.  Add the eggs, one at a time, beating well after each.  Beat in the milk and vanilla.  Turn the mixer to low and stir in the chopped figs and currants. Slowly add the flour mixture until combined.

Pour the batter into the prepared into the prepared mold and fasten the lid.  Place the mold on a rack (I used a large biscuit cutter ring) in a large pot.  Pour in boiling water until it reaches halfway up the sides of the mold.  Place over high heat and bring to a boil.  Reduce heat to medium low, cover the pot and boil gently for 2 hours, replenishing the water as needed.

Remove the mold from the water and let rest, sealed, for 15 minutes.  Remove the lid and invert onto a serving platter, tapping gently to release pudding.

Bring the reserved cooking liquid from the fruit to a boil, cooking until reserved to 1/2 cup, about 5 minutes.

Cut the pudding into wedges, drizzle with the syrup and top with whipped cream.  Print Recipe


No automatic alt text available.

Let's see what the others are bringing to celebrate National Fig Week!